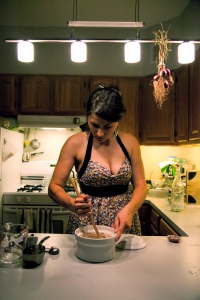
Sourdough English Muffins

It’s a little more work than pancakes, but these english muffins are another great way to use up excess sourdough starter. I absolutely adore english muffins but I never buy them because in our household we just can’t go through bread fast enough to warrant options. (Though that’s changing now that we have another roommate.)

These muffins call for sourdough starter but the starter isn’t the leavening agent – baking soda is. The starter adds flavor and enough acidity to activate the baking soda. If you’re willing to get out of bed an hour early, you can whip these up on a school day. Just mix the dough the night before. It’s so much fun to watch them puff up on the griddle!

Here’s the recipe, adapted from a post on The Fresh Loaf.

Whole Wheat Sourdough English Muffins

1/2 cup whole wheat starter

1 cup milk

1 Tablespoon sugar

3/4 teaspoon salt

2 & 3/4 cups whole wheat flour

1 teaspoon baking soda

cornmeal

Mix the starter, 2 cups of flour, and milk in a large bowl.  Stir to combine, cover, and leave out for 8 hours or overnight.

In the morning, add remaining flour, sugar, salt and baking soda and mix well.  Turn onto a lightly floured surface and knead for 4-5 minutes.  Roll out to 3/4 inches and cut into rounds with a biscuit cutter (or water glass).  Roll out the scraps and cut more muffins from them.  Dust a sheet pan or silpat mat with cornmeal, place muffins on the pan using a spatula, dust the tops with cornmeal and let rest for 45 minutes.

Very lightly oil or butter a pancake griddle. Heat to medium-low and cook muffins for about 6-8 minutes on each side, or until browned on the top and bottom and cooked through.

Notes: An over-greased griddle creates a crispy crust, which just isn’t quite right for an english muffin. This recipe should work with white flour, but you may need to adjust the amount of flour. Like store-bought muffins, these really must be toasted.

Happy, Healthy Sourdough Starter!

Yep, that’s the news. My sourdough starter is gurgling and frothing away, and last week I made two GREAT sourdough loaves. (I’ll post about those later.) Having received both my starters from friends I had not really read up on caring for a starter. I just added equal parts flour and water once a week (if the starter is living in the fridge) or once a day (if the starter is living on the counter). I was reading the forums on The Fresh Loaf and discovered that I should be adding both flour and water equal to the weight of the starter. OH. That means if I have 8 ounces of starter, I need to add 8 ounces of flour and 8 ounces of water at every feeding. Though my starters have seemed healthy, they’ve been following a rather prude diet. So yesterday I gave my starter a proper feeding and wow did it froth up. Twelve hours later it had doubled in volume. I’m curious to see the renewed rising power of my post-anorexic yeast culture.

I also plan to keep the starter on the counter for the foreseeable future to diminish the sour flavor – another tip from The Fresh Loaf.

This new feeding schedule is going to create a serious excess of starter, so I’m stocking up on quick-bread recipes to use it up. Today I made cornmeal sourdough pancakes for lunch. They were excellent – better than the original! I simply substituted 1 cup of starter for 1/2 cup of flour and 1/2 milk from my favorite buttermilk pancake recipe. They didn’t taste the slightest bit sour or yeasty, and they were much lighter than my usual pancakes. Next on the menu….crumpets and sourdough biscuits.

Nursing a starter back to health.

Again, I let my sourdough starter go hungry for far too long. I am a terrible mother. But I do have a pretty good excuse: the past month has been a whirlwind of packing, moving, and then unpacking. And the requisite IKEA trip. But the spacious new apartment is so worth it – especially considering the kitchen cabinet space! If you’re like me, deep drawers for bowls are one of life’s little luxuries.

But forgetting to feed my starter is just one of the things that fell by the wayside. (Be glad I’m not posting about my overdraft charges – though I’m vindicated by this New York Times article.) I gave the starter a peek last night. A gummy doughy base was submerged in gray liquid. The separation of flour and liquid is normal…but not that sickly gray hue. I assumed it was mold. Vigorously stirring the doughy mass revealed an air pocket that released inky liquid. Mold. Ick. As a scientific type I am sort of delighted that I witnessed a bakebook admonition come true. Several sources warn that starters must be well stirred, lest an air pocket or clump of flour provide a haven for mold to grow. In a healthy starter the yeast defends its territory against molds. There ain’t room for the both of ’em. But a dry pocket keeps the yeast out, giving mold a little foxhole.

So I’m running an experiment to see if my yeast can reclaim its territory. Last night I stirred it all together (dough, liquid, mold, and yeast) and added one cup each fresh water and fresh flour. Tonight I did the same, discarding a cup’s worth or starter. The starter is not looking so horribly gray now and the odor is kinda normal. I don’t plan on baking with it anytime soon, but I’ll be watching daily for signs that the mold is entirely gone and yeast is thriving again.

crusty white peasant-style pot bread

Crusty White Peasant-Style Pot Bread

This summer I received two birthday gifts that will keep on giving for a long time. The first was a seltzer machine. I think my mother expected me to use that Amazon gift certificate for something essential, like a Kitchen Aid mixer, but with Joe purchasing 2 liters of Perrier almost daily, a seltzer machine seemed downright practical. The second gift was a cookbook, Kneedlessly Simple, from two very thoughtful co-workers. I’d heard of no-knead breads…I remembered but hadn’t tried that famous no-knead recipe in the New York Times, and I had also come across an English Muffin post on A Year in Bread that piqued my interest. Receiving this book gave me a perfect opportunity to try something completely different. While I’m patting myself on the back for sticking with the hearth loaf recipe, I and my eaters are a little bored with it. It continues to improve, but it is what it is. And whatever it is does not have big yummy gaping holes.

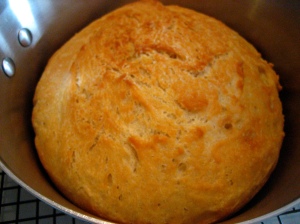
But no-knead Crusty White Peasant-Style Pot Bread does! The process involves several very long fermentation periods. After mixing the ingredients, the stiff dough went into the fridge for 10 hours (the recipe calls for a minimum of 3 hours). So that was Thursday night. When the dough came out of the fridge it sat for a 24-hour rise at a cool room temperature. This was during that heat wave back in August and I cringe to say I left the dough in front of a running air-conditioner all day while I was at work. It was the only way to maintain 67-70 degrees. I’m not even sure I could guarantee those temperatures during the winter! After a gentle punch-down I had options for the last rise. Since it was evening, I did another extended rise in the refrigerator overnight instead of a 2-hour rise at a warm room temperature. I could have left the dough in fridge for another full 24 hours, bringing the fermentation period up to 58 hours – whoa. The science behind all of this fermentation is micro-kneading. According to experts, the fermentation process mimics kneading on a molecular level. The secret is a long fermentation, and that must be at lower temperatures in order prevent the yeast from losing it’s vigor. So on Saturday morning I brought the dough back up to room temperature and placed it in a plain old sauce pan. I added a sprinkle of coarse salt, lidded the pot, and popped it in the oven. Keeping a lid on the pot created an ideal steamy environment.

Restoration Farm Potluck

The result was, dare I say, heavenly. I brought it to Caroline’s Restoration Farm potluck and in retrospect, I wish I had kept it all for myself! The finished loaf was golden-brown on top and riddled with large moist holes. When I tore off a slice the crumb separated in rough strips like string cheese. My only complaint is the unassuming pot shape: round with flat sides. I’m thinking next time I’ll try using a lidded oval ceramic mold I’ve yet to find a use for. And now that we’ve got cold weather on the way, I can forgo the air-conditioner!

Greatest bread site ever!

The answers to so so many questions are buried in this treasure of a website! I can’t wait to try out the tips on maintaining a sourdough starter. And maybe I’ll sail right on past measuring ingredients by weight and tackle baker’s percentages!

http://www.thefreshloaf.com/

Putting Food By

I do still have a baking excursion to relay, but the real reason for my recent lack of posts is one, our August heat wave, and two, my newest kitchen hobby, canning. Joe and I spent last weekend in the Catskills and stopped at a farm stand on the way home, where I couldn’t resist buying a 25-lb box of canning tomatoes for $10.00! Now I have 13 rosy pints of tomatoes put aside. But please don’t ask me for one – I’d really prefer not to risk poisoning my friends with botulism. Besides, it took me 6 months to bake bread for a crowd. Canning isn’t the simplest process either. If you really insist though you can have a jar of dilly beans.

Country-Style Hearth Loaf with Cornmeal, Cilantro, and Coarse Pepper

mixing the poolish before a party

mixing the poolish before a party

I have a lot of friends here in Brooklyn. Actually, I have a lot of friends here in North Brooklyn. I think it’s pretty wonderful when feeding a friend’s cat over the weekend involves walking exactly one block. Some of these friends have blogs too, like Kenan, who had the genius idea of getting together a group of food and photo bloggers to create a big ole midsummer meal and, well, blog about it! We called it NBBB for North Brooklyn Bloggers’ Banquet.

For me this was good timing. Believe it or not, hardly anyone has actually tasted my bread. I frequently improvise meals for guests with confidence, but most of my loaves thus far have been barely edible! Now that I had a few success stories, it was time to share.

Emily planned to make a soup, in the tradition of her wild soup-night parties. She was deciding between a middle eastern and a mexican theme; I decided to follow her lead with my bread. (As a perfectionist, I’m loathe to mix themes in a meal!) I found two promising recipes in Bread Alone: 100% Whole Wheat Cumin Loaf and Country-Style Hearth Loaf with Cornmeal, Cilantro, and Coarse Pepper. I chose the latter when Emily went south of the border with Cold Avocado Corn Soup with Cilantro Oil.

Following the same process as my first Hearth Loaf, I mixed the poolish the night before. I nearly forget this vital step because I happened to be throwing a roof-top dance party. (Hence the dress!) Whisked together, the water, yeast, and flour went into the fridge. I set my alarm for 10am to bring the bubbling gruel back to room temperature.

emptying my beautiful new bread bowl, about to start kneading

emptying my beautiful new bread bowl, about to start kneading

Around 1pm on Sunday I got to work kneading. The added ingredients made this a fun dough. I measured every ingredient ahead of time (a rare feat for me), I ground pepper corns in a mortar (watch out, they pop!) and I chopped cilantro leaves (from an absurdly large bunch). I attempted to add a lot more flour during the knead but in retrospect I think I could have been even more generous.

Also around 1pm, Cate and Kenan arrived with grand plans. Cate was making an Almond Tart and Currant, Raspberry & Cherry Frozen Yogurt; Kenan documented our exploits with sketches. Cate has a bit of bread experience herself and helped me knead.
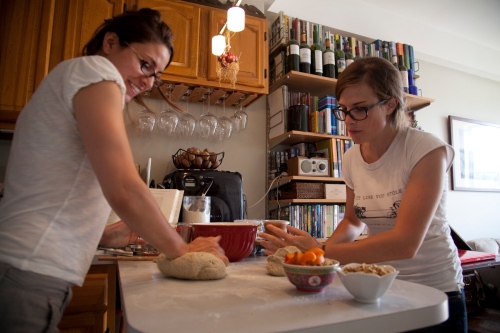
Cate and I kneading together

Cate and I kneading together

Sunday was hot. Not an ideal environment for baking bread…nor for hangovers! (And not for sick husbands either – I prescribed air-conditioned bed-rest to poor Joe, who had a bad cold.) The heat does encourage rising dough. Technically a faster rise develops a less flavorful bread, but I had already fermented a very long poolish at a low temperature, and welcomed a fool-proof rise. But I wasn’t looking forward to turning on the oven. Mere sunlight is enough to bring my apartment into the high 80s. So while my bread rose, and Cate slaved away at dessert, I lay on the couch with a water bottle. Emily arrived to start on the soup in the late afternoon.

NBBB
NBBB

Around 6pm, the rest of the banqueteers arrived, and chaos ensued. There were no less than 5 cooks in my 10ft x 8ft kitchen, plus 3 photographers. For some reason we never turned on the A/C, and it was definitively over 90 degrees in there! But thanks to our sweaty work, Dory, Jake and Tanveer whipped up three more incredible dishes: Watermelon, Tomato, and Goat Feta Salad, Shell Bean and String Bean Ragout, and Squash Curry Stew. Along with the soup and the dessert, it was an exquisite meal.

The North Brooklyn Bloggers

This bread came out very well – right on par with my previous loaf. My crumb and crusts have become pleasantly chewey, I had good oven spring, and the crumb is even (generally a positive trait). I enjoyed the added flavorings but couldn’t taste much more than the pepper! A full tablespoon per loaf is a lot of pepper. These were actually spicy! Next time I try this recipe I plan to cut way back on the pepper and possibly even increase the cilantro. My other plan (for any loaf) is to add more flour during the kneading process. Once again, my loaves spread during proofing. I think I need to give my dough a little more backbone. Luckily I have an excuse to practice – Caroline’s Restoration Farm potluck is right around the corner!

Honey Wheat Bread with Poppy Seeds and Lemon

Honey Lemon Poppy Seed Wheat Bread

Honey Wheat Bread with Lemon and Poppy Seeds

I broke the mold! In fact, it’s still the same Country-Style Hearth Loaf, but with a twist. I felt confident in my resolve to knead more vigorously and bake less. Confident enough to add…STUFF. STUFF can profoundly alter how much a dough will rise, so I’d planned to avoid that challenge at first. (As in any science experiment – we’ve got to limit those variables!) In fact, I usually buy plain loaves at the bakery because they go with everything, but I do love a loaf with a theme.

the ingredients

the ingredients

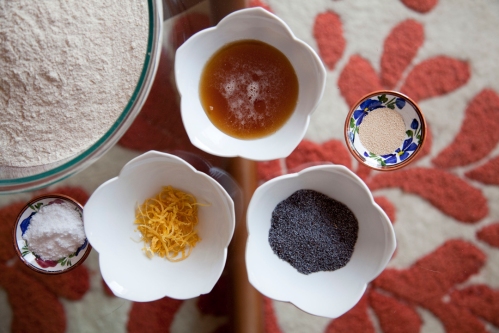
That weekend, I just happened to have on hand an old bag of poppy seeds and a jar of honey gone crystal. Considering last year’s very successful resolution to avoid wasting food, I was delighted to find a recipe in Bread Alone for Honey Wheat Bread with Poppy Seeds and Lemon. The recipe is essentially a Country-Style Hearth Loaf, except that it calls for half the flour to be whole wheat. Classic Liz: I just substituted my trusty ole 20% bran flour. 20% bran really is plenty for me, and besides, the 25-lb bag I bought from Wild Hive has been taking up far too much space in my fridge. (Oh, to have a pantry…and a root cellar!)

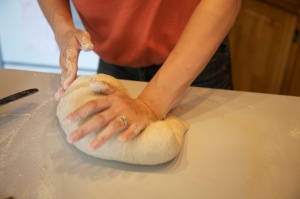
So I kneaded like a mad woman, once splitting the wad of dough into two pieces. That helped me really work the dough without tiring. I also made use of an autolyse, a technique I learned from Farmgirl Susan. I kneaded the dough for a few minutes, let it rest on the counter for 20 minutes, and then finished the kneading. I should be adding the salt to the dough after the autolyse, but I didn’t think to try an autolyse until I’d already mixed the dough. Salt tightens the gluten strands; kneading before adding salt helps develop gluten faster. I am already kneading for longer than recommended – I hope that an autolyse and practice will help quicken the process.

I’m beginning to think I am actually adding too little flour. Though I consistently add at least the maximum measure of flour, my doughs still feel tacky. Every flour absorbs a different volume of water; perhaps mine is thirstier than most. Searching for answers I stumbled upon Baking 911. Though aesthetically upsetting, this site compiles a motherload of bread baking tips, and I found one of my symptoms: “A free-form loaf spread too much as it was rising.”  The answer? “The dough was too soft. Free-form loaves must be quite firm when shaped. Next time, add more flour, use a ring to contain the dough, or let it rise in a basket.” Well, I am already using a basket for proofing, but my loaves seem to spread out the instant they’re on the peel. It’s time to try more flour!

great crumb

great crumb

Nonetheless, this was good bread! I baked the bread only 30 minutes instead of the suggested 40 minutes and achieved a soft, chewy crust. No more croutons! Though I still haven’t topped that sourdough back in April, I think this loaf is one of the best yet!

P.S. For my birthday, two co-workers bought me Kneedlessly Simple – a cookbook of knead-free breads. I’m looking forward to trying something completely new!

Ho-Hum

kneading

Well, you missed pita bread and caramelized onion foccacia. I would have written about pita but my photos were accidentally deleted! Suffice to say I was incredibly impressed with the “puff” that creates the pita pocket, and by cooking only 3 at a time, I was able to improve my technique over the course of a single batch! Next time pita comes to call I will give it a full post. Foccacia, well, foccacia is so much easier that I thought it might be a cheap post topic. But I love it to death all the same.

loaf with a hard crust

Ho-Hum, however, refers to another dogged attempt at the Country Style Hearth Loaf. While acceptable, this latest incarnation shares the same fault as the previous version: an incredibly hard, thick crust. Just cutting a slice creates a flurry of breadcrumbs. I’m thinking that during the next round I’ll try lowering the oven temperature or decreasing the bake time. I’m also noticing that the proofed loaves don’t hold their shape as I transfer them to the peel and slide them into the oven. As a reult they’re a bit flattened when they hit the oven which isn’t helping the crust situation. Next I’ll try more kneading – I could use an arm workout anyway!

Late-Night Labors

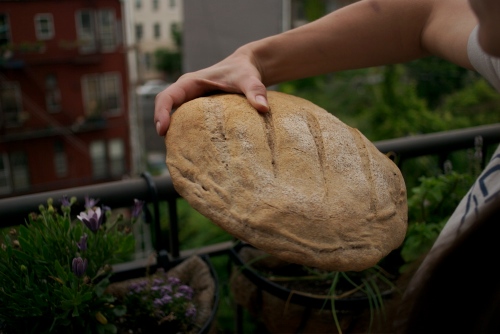
My second Hearth Loaf came into the world at 1:37am. It began as a small, wet, unformed poolish Saturday morning on May 30th. As a young poolish it grew and bubbled and smelled sweetly of yeast. Through the first fermentation it rose gracefully over the lip of its bowl, delighting me with its exuberance. I lovingly split and shaped it into two round loaves, allowing a chance to rest between. In the midst of proofing, I despaired that I could not care for this loaf in every way it deserved. I saw looming ahead a 5:30am call time on my husband’s film shoot. Pursuing my maternal instincts I vowed to properly raise my young loaves, no matter the cost to myself. Retiring at 11pm, I set an alarm for 12:30am, another for 1:00am, and yet another for 1:40am. At the first alarm I arose to light the oven. At the second alarm I bolted up to slide the hapless loaves into the inferno. Sleeping fitfully on the sofa, I woke to check them, and was dismayed to find them both sagging frightfully under their own weight. I paced until 1:37, then removed them from the hellish heat. Their youthful promise faded beneath a thick, hard crust and wrinkled edge. Joseph suggested purposing a loaf for sport: a discus throw seemed fitting, but I lamented such a base fate! Old before their time, I consumed them both, determined to give meaning to their short lives.

discus bread